Have you ever approved a product design only to discover late-stage failures during testing or manufacturing? That scenario is common when ideas move forward without proper validation.
According to the U.S. National Institute of Standards and Technology (NIST), inadequate design validation and late defect detection cost manufacturers billions of dollars annually in rework and scrap. Many of those losses originate from skipping structured prototyping.
The core problem is simple: CAD looks correct, but real-world behavior differs. Materials flex, assemblies misalign, and tolerances stack unpredictably. Engineers solve this through staged prototype development, early testing, and iterative improvement before committing to tooling.
Using structured prototype design models allows teams to detect risk early, refine performance, and stabilize manufacturing readiness.
In this guide, you will learn how prototype design models work, which types to use, how to validate performance, and how to transition confidently into production.
Key Takeaways
Early prototype design models uncover structural and usability risks before tooling investment, protecting both schedule and budget.
Matching prototype fidelity to validation goals prevents wasted effort and ensures each iteration answers a specific engineering question.
Material realism matters more than visual accuracy when testing performance, durability, and manufacturability.
Structured iteration reduces redesign cycles by converting assumptions into measurable engineering data.
Production success depends on validating manufacturability within prototype design models, not after tooling begins.
What Are Prototype Design Models in Product Development?
Every successful product begins with validation, not manufacturing. Prototype design models are physical or digital representations created to evaluate design intent before full production investment.
They help engineers:
Detect risk before tooling.
Verify assembly relationships.
Predict manufacturing behavior.
Evaluate ergonomics and usability.
Visualize real geometry beyond CAD.
Instead of guessing performance, teams confirm it experimentally. Once the purpose of prototype design models is clear, it’s important to understand how they fit into the overall development workflow.
The Complete Prototype Design Workflow: From Idea to Production
Product development follows a structured path. Prototype design models guide decision-making at each stage, ensuring teams validate assumptions before investing in tooling and large-scale manufacturing.
The typical workflow includes:
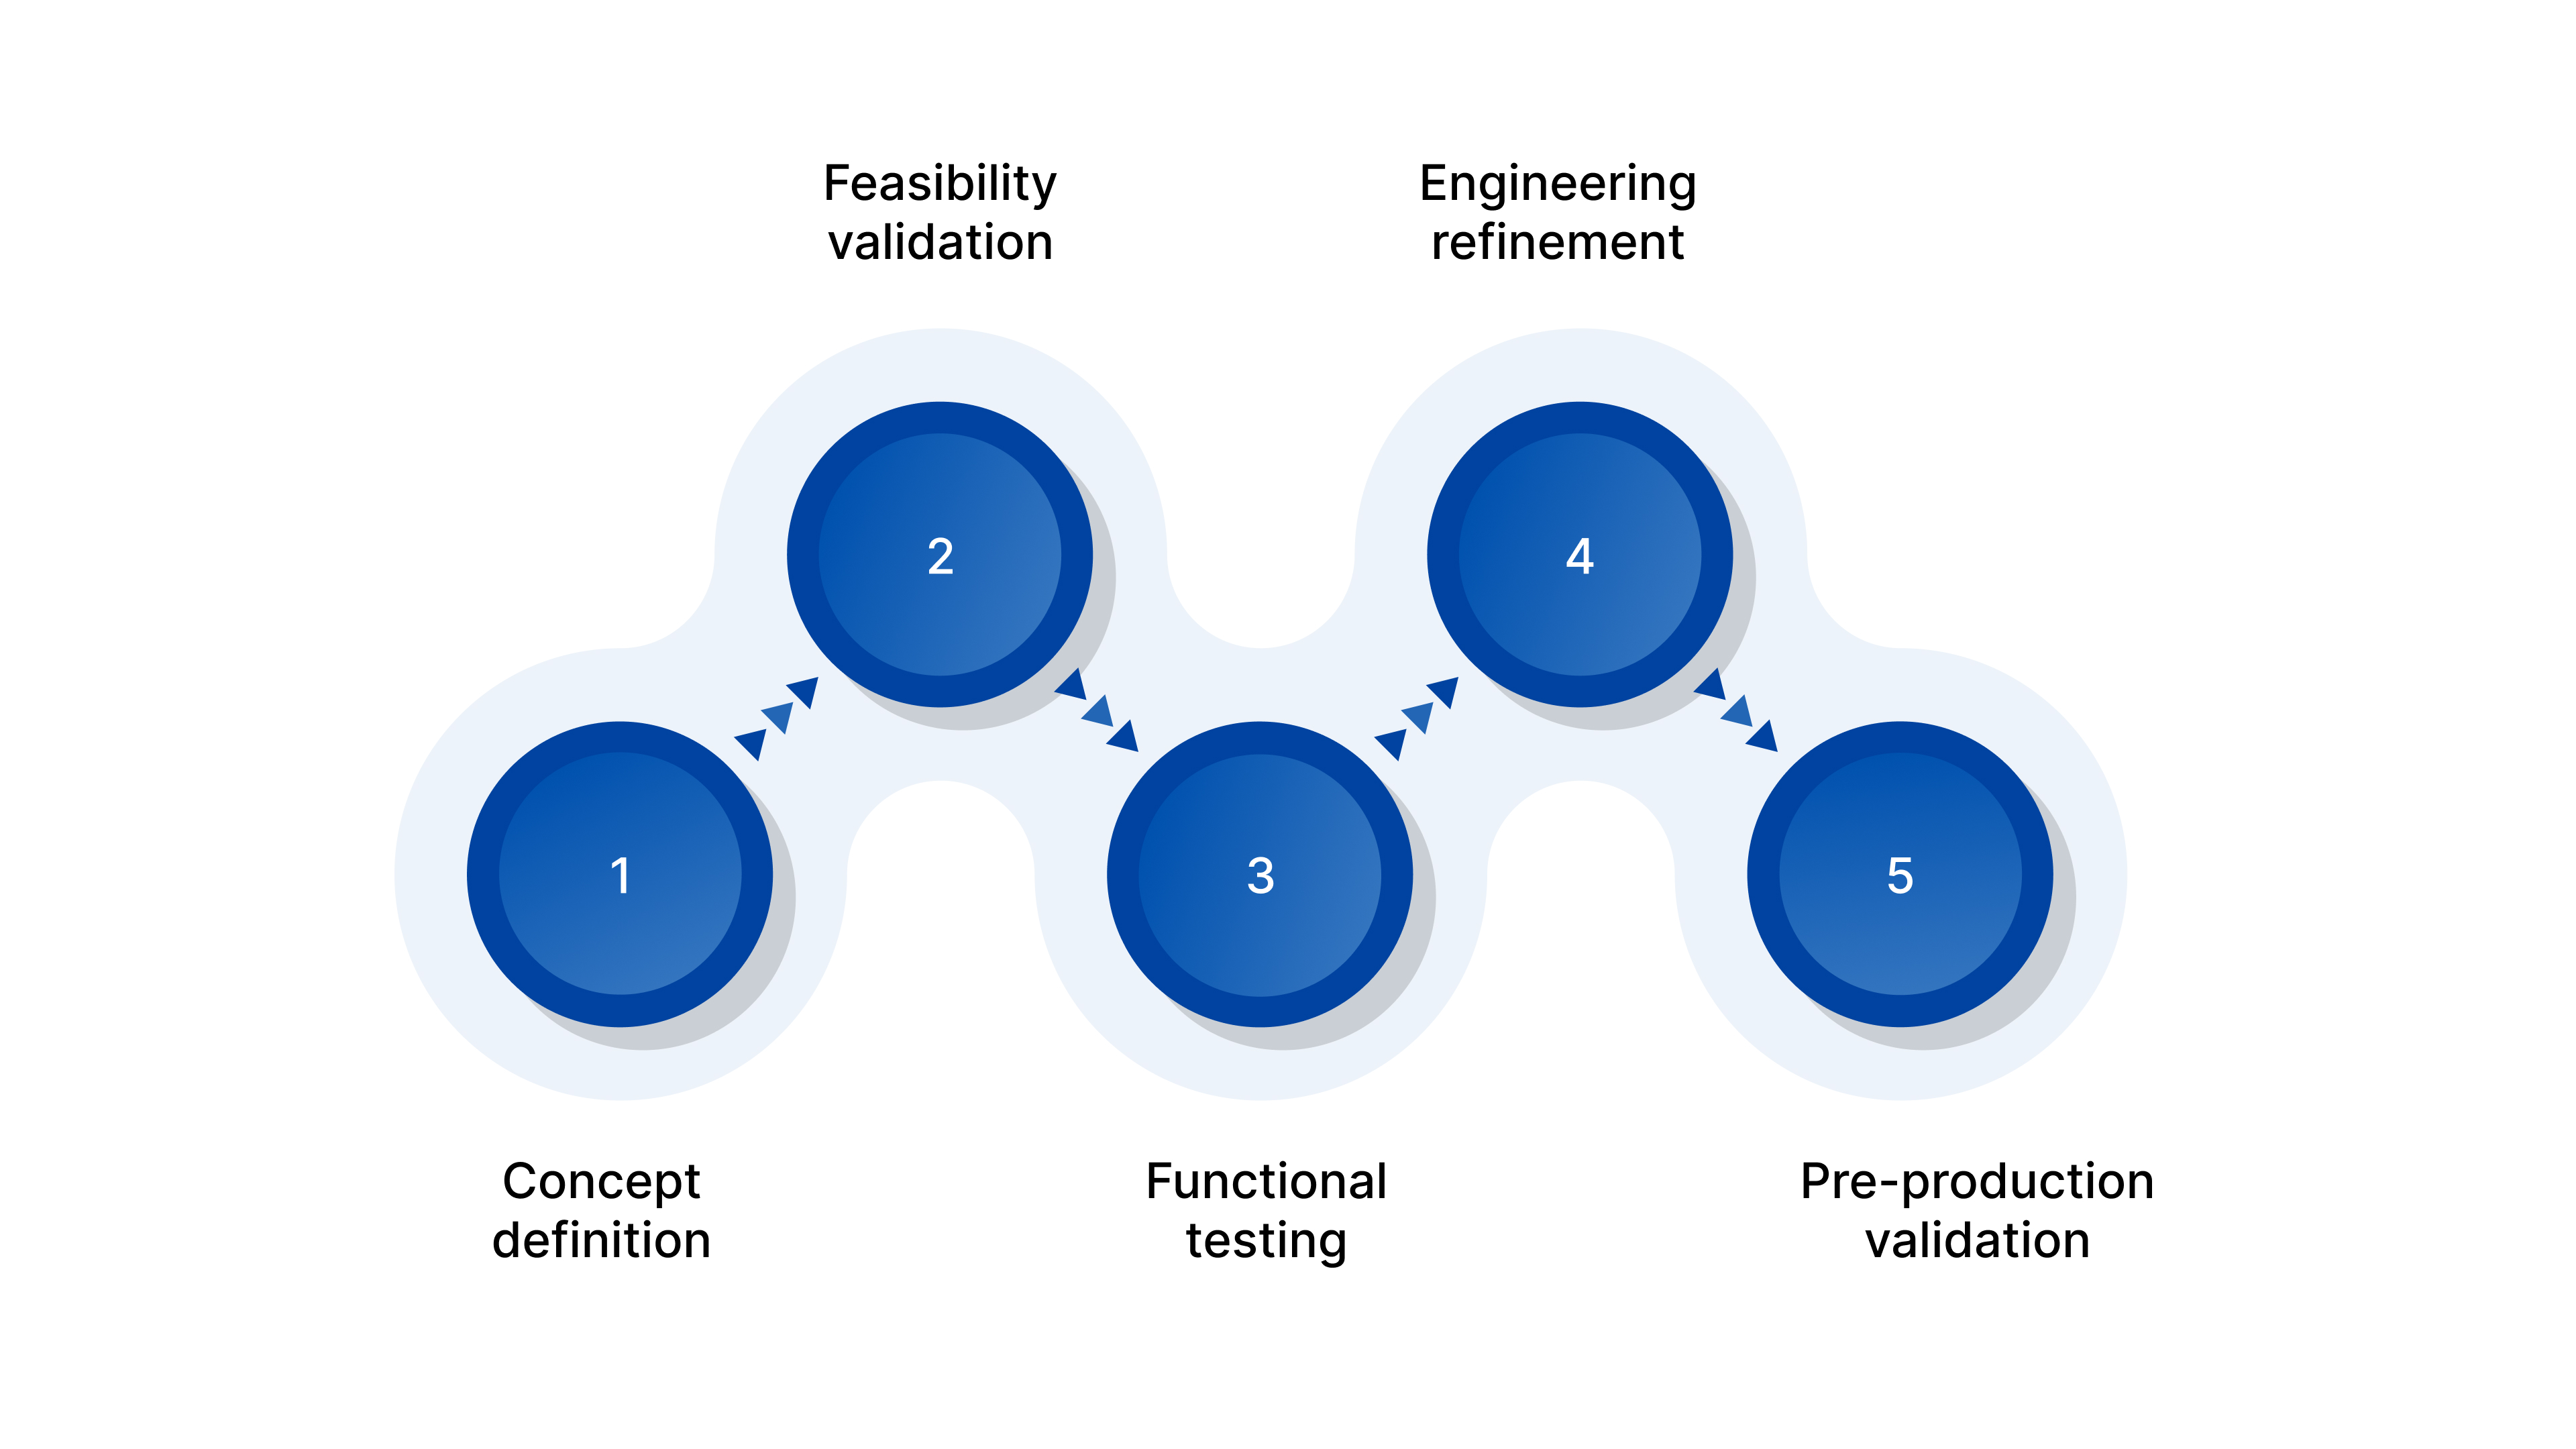
Concept definition: Translate ideas into measurable design criteria, including size, performance targets, constraints, and user requirements. Early concept models expose impractical geometries and clarify feasibility before engineering resources are heavily committed.
Feasibility validation: Build early prototype design models to confirm core functionality and identify structural, thermal, or mechanical conflicts. This stage determines whether the idea can physically perform as intended under realistic conditions.
Functional testing: Test prototypes under simulated operating loads, environmental exposure, and repeated use cycles. Engineers collect data on durability, fit, and failure points to refine performance before moving toward production-grade materials.
Engineering refinement: Optimize geometry, tolerances, and material selection based on test results. Updated prototype design models confirm corrections, ensuring dimensional stability and assembly compatibility align with manufacturing constraints.
Pre-production validation: Create near-production prototypes using final materials and intended processes. Validate tooling readiness, assembly workflow, and quality consistency to reduce risk before authorizing full-scale manufacturing.
Each stage reduces uncertainty and prevents expensive corrections later. To apply this effectively, engineers must understand the different types of prototype design models available.
Types of Prototype Design Models and When to Use Them
Different goals require different validation approaches. No single prototype design model type answers every question.
Selecting the right stage prevents wasted cost and missing validation.
Concept Models: Represent overall size, form, and ergonomics without functional detail. Use them early with quick 3D prints or foam builds to gather stakeholder feedback, verify proportions, and eliminate impractical shapes before engineering work begins.
Proof-of-Concept Models: Focus only on validating a working principle, mechanism, or physical behavior. Build simple working rigs or partial assemblies to confirm feasibility before investing in detailed CAD design or material-specific testing.
Visual Appearance Models: Replicate color, texture, and surface finish for marketing and approval decisions. Use painted or cosmetic-grade builds to validate branding, perceived quality, and customer acceptance before committing to expensive tooling finishes.
Functional Prototypes: Operate under real-world loads to evaluate performance and durability. Manufacture using appropriate materials to test strength, motion, and wear, ensuring the design survives expected operating conditions.
Engineering Prototypes: Match intended materials, tolerances, and assembly methods closely. Use them to confirm manufacturability, fit, and dimensional stability before cutting production tooling.
Pre-Production Prototypes: Produced using near-production tooling or processes. Validate assembly workflow, quality consistency, and production readiness to prevent costly launch-phase failures.
Choosing the right prototype design models prevents over-engineering early and under-testing late.
Low-Fidelity vs High-Fidelity Prototypes: Choosing the Right Accuracy Level
Not all testing requires precision. Matching fidelity to purpose saves time and cost. Selecting the appropriate level depends on what decision the team needs to make next.
To clarify the differences, the comparison below highlights how low-fidelity and high-fidelity prototype design models serve distinct development goals:
Comparison Area | Low-Fidelity Prototype Design Models | High-Fidelity Prototype Design Models |
Primary Purpose | Explore concepts and basic forms quickly. | Validate performance, durability, and production readiness. |
Level of Detail | Simplified geometry with minimal functional features. | Detailed geometry replicating final product intent. |
Material Accuracy | Substitute or inexpensive materials. | Production-like or actual end-use materials. |
Tolerance Precision | Loose dimensional control; not production-accurate. | Tight tolerances close to manufacturing targets. |
Cost & Speed | Low cost and rapid turnaround. | Higher cost and longer lead times. |
Iteration Frequency | Multiple quick revisions expected. | Fewer revisions; changes become more expensive. |
Decision Impact | Guides early design direction. | Confirms readiness for tooling and launch. |
Balancing fidelity ensures efficient development. After selecting fidelity, engineers follow a structured creation process.
Key Stages in Creating a Prototype Design Model
Once the fidelity level is selected, engineers must execute a controlled workflow so prototype design models generate measurable engineering data instead of subjective feedback.

Key stages include:
Define validation objective: Identify the parameter to verify, strength, sealing, thermal resistance, assembly fit, or ergonomics. Establish quantitative acceptance criteria (force, tolerance, temperature range, wear cycles) so the prototype produces actionable pass/fail engineering results.
Select material behavior level: Choose materials based on required accuracy: surrogate plastics for geometry checks, or production-grade resin/metal for mechanical testing. Match modulus, shrinkage, and thermal expansion when validating structural or dimensional performance.
Choose manufacturing method: Select processes aligned with purpose: 3D printing for speed, CNC machining for tolerance validation, or soft tooling for molding behavior. The manufacturing method determines achievable surface finish, accuracy, and test reliability.
Build prototype: Control fabrication parameters, layer orientation, machining allowances, or molding conditions. Record process settings to ensure test repeatability and allow correlation between prototype behavior and future production processes.
Perform testing: Run structured tests such as load testing, environmental cycling, drop impact, or assembly verification. Measure with calibrated instruments and collect numerical data rather than visual observations to support engineering decisions.
Document results: Record dimensions, deviations, failure modes, and environmental conditions. Compare results against defined acceptance criteria and maintain traceable documentation for design reviews and regulatory or customer validation requirements.
Iterate design: Modify CAD based on measured deviations, not assumptions. Adjust geometry, tolerances, or materials and repeat validation until performance stabilizes within specification limits.
Iteration transforms assumptions into measurable knowledge. Material selection now becomes critical.
Materials Selection for Prototype Development
To make prototype design models predictive instead of misleading, engineers must match material behavior to the validation goal.
The selection criteria ensure test results represent real production performance rather than approximate assumptions.
Mechanical strength similarity: Compare tensile strength, modulus, and impact resistance to the intended production material. Structural testing requires similar stiffness and failure behavior; otherwise, deflection, fatigue, and load-bearing performance conclusions become inaccurate.
Thermal resistance: Evaluate glass transition temperature, heat deflection temperature, and thermal expansion. Prototypes used near heat sources must maintain shape and tolerance; low-temperature substitutes can warp, creep, or soften, invalidating real operating conditions.
Flexibility behavior: Assess elongation at break and elastic recovery. Snap-fits, seals, and living hinges require matching flexibility; overly rigid substitutes crack during testing, while overly soft materials hide assembly stresses and retention failures.
Surface quality: Check achievable roughness, texture replication, and coating compatibility. Cosmetic validation depends on the material accepting finishing processes similar to production; mismatched surfaces distort visual approval and downstream finishing feasibility.
Cost vs accuracy trade-off: Balance engineering-grade materials against economical substitutes based on the test purpose. Early concept validation can use low-cost materials, but functional validation requires near-production materials to avoid repeating expensive validation cycles later.
Wrong material choices create misleading test results. After materials, manufacturing technology determines feasibility.
Prototyping Technologies and Manufacturing Methods
Technology affects speed, cost, and realism of prototype design models.
Engineers choose a process based on what performance characteristic the prototype must realistically represent.
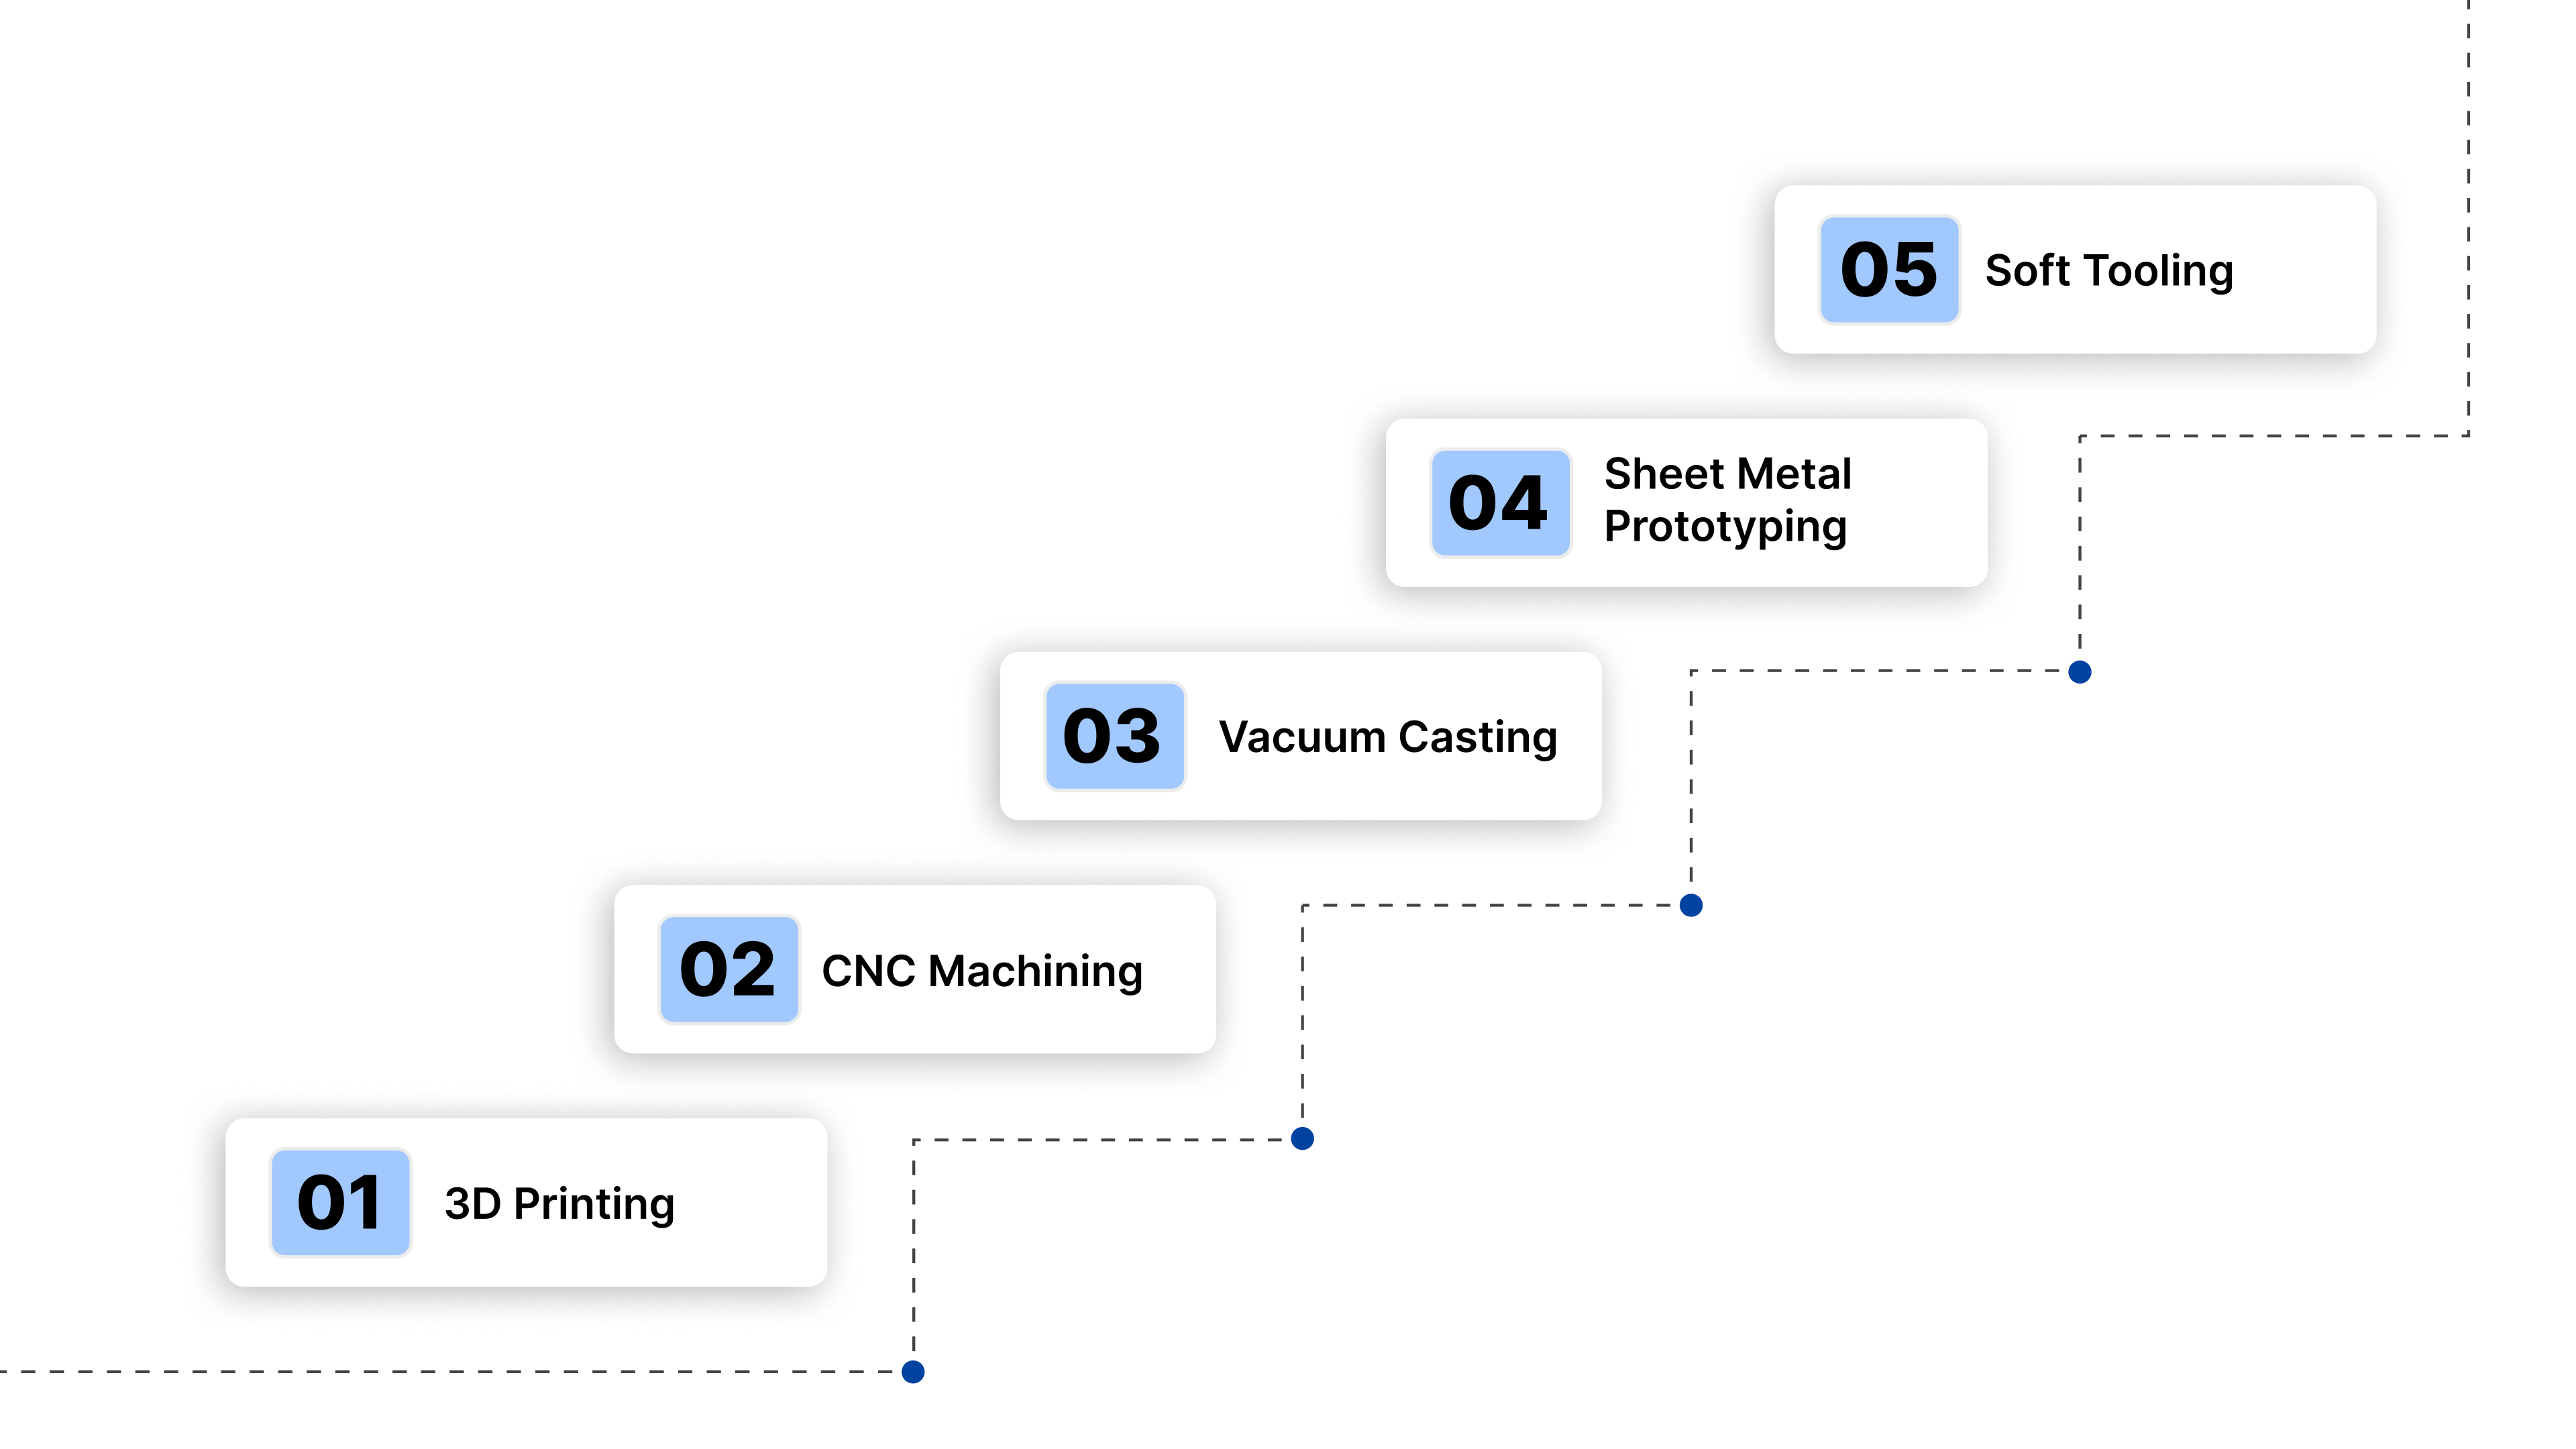
3D Printing: Layer-by-layer fabrication builds complex internal features impossible with subtractive methods. Engineers use it to evaluate geometry, airflow paths, snap features, and ergonomic interaction. However, anisotropic strength and limited material equivalence restrict it to early validation rather than final mechanical testing.
CNC Machining: Material is cut from solid stock using controlled toolpaths, producing tight tolerances and true production-grade material behavior. Engineers rely on CNC for fit validation, threaded interfaces, bearing seats, and load testing because properties closely match molded or machined end-use parts.
Vacuum Casting: Silicone molds replicate a master pattern to create multiple urethane parts with consistent geometry. Engineers use it for short-run functional evaluation, assembly trials, and customer samples because it balances appearance accuracy with moderate mechanical realism before tooling investment.
Sheet Metal Prototyping: Laser cutting and bending simulate fabricated enclosures and brackets using production alloys. Engineers validate stiffness, fastening locations, and tolerance stack-ups, ensuring formed parts assemble correctly before committing to progressive dies or stamping tools.
Soft Tooling: Aluminum or bridge tooling produces low-volume molded parts using near-production processes. Engineers evaluate shrinkage behavior, gate locations, and assembly interaction, providing the most reliable prediction of injection molding performance before hardened steel tooling is built.
Technology selection should match validation goals. Now prototypes must prove performance.
Design for Testing: Validating Form, Fit, and Function
Testing converts prototypes into engineering decisions.
Engineers must measure specific attributes rather than rely on visual judgment.
Form: Appearance and Ergonomics
Engineers verify dimensional conformity to CAD surfaces, edge radii accuracy, texture replication, grip comfort, visibility angles, and human interaction zones. They also evaluate reach distances, button accessibility, and user contact pressure to ensure the product feels correct during real handling.
Fit: Assembly Compatibility
Engineers check tolerance stack-ups, mating clearances, snap-feature engagement force, fastener alignment, sealing compression, and interference zones. Components must assemble without forcing or deformation while maintaining positional accuracy required for downstream mechanisms or electrical alignment.
Function: Performance Under Load
Engineers apply expected operational loads, thermal cycles, vibration, and repeated actuation to measure deflection, fatigue resistance, wear points, and failure thresholds. Testing confirms the design survives real service conditions instead of only passing static inspection measurements.
Measured results refine the next version of prototype design models. Without proper testing, iteration becomes guesswork.
Common Prototype Design Mistakes and How to Avoid Them
Even good teams misuse prototype design models.
Recognizing these technical errors early prevents wasted iterations and unreliable validation results.
Testing appearance instead of performance: Teams focus on cosmetic approval while ignoring structural or functional validation. Avoid this by defining measurable performance criteria first and prioritizing load, fit, and environmental testing before investing in surface finishing.
Using wrong materials: Substitute materials may not replicate strength, flexibility, or thermal behavior. Prevent misleading results by selecting materials with comparable modulus, shrinkage, and expansion properties aligned with the intended production application.
Skipping tolerance checks: Designs may visually assemble but fail dimensional stack-up requirements. Avoid this by measuring critical features using calibrated equipment and validating assembly clearances against specified tolerance limits.
Over-refining early prototypes: Spending time perfecting surface details too early delays functional learning. Focus first on verifying core mechanics and manufacturability, then refine cosmetics once performance stabilizes.
Moving to tooling too early: Committing to production tooling before validating performance locks in design flaws. Reduce risk by completing functional, dimensional, and assembly validation using advanced prototype design models prior to steel cutting.
Avoiding these errors accelerates development and reduces cost.
Cost Factors and Time Considerations in Prototype Development
Speed and cost depend on prototype strategy.
Development cost and schedule are primarily influenced by the following technical factors:
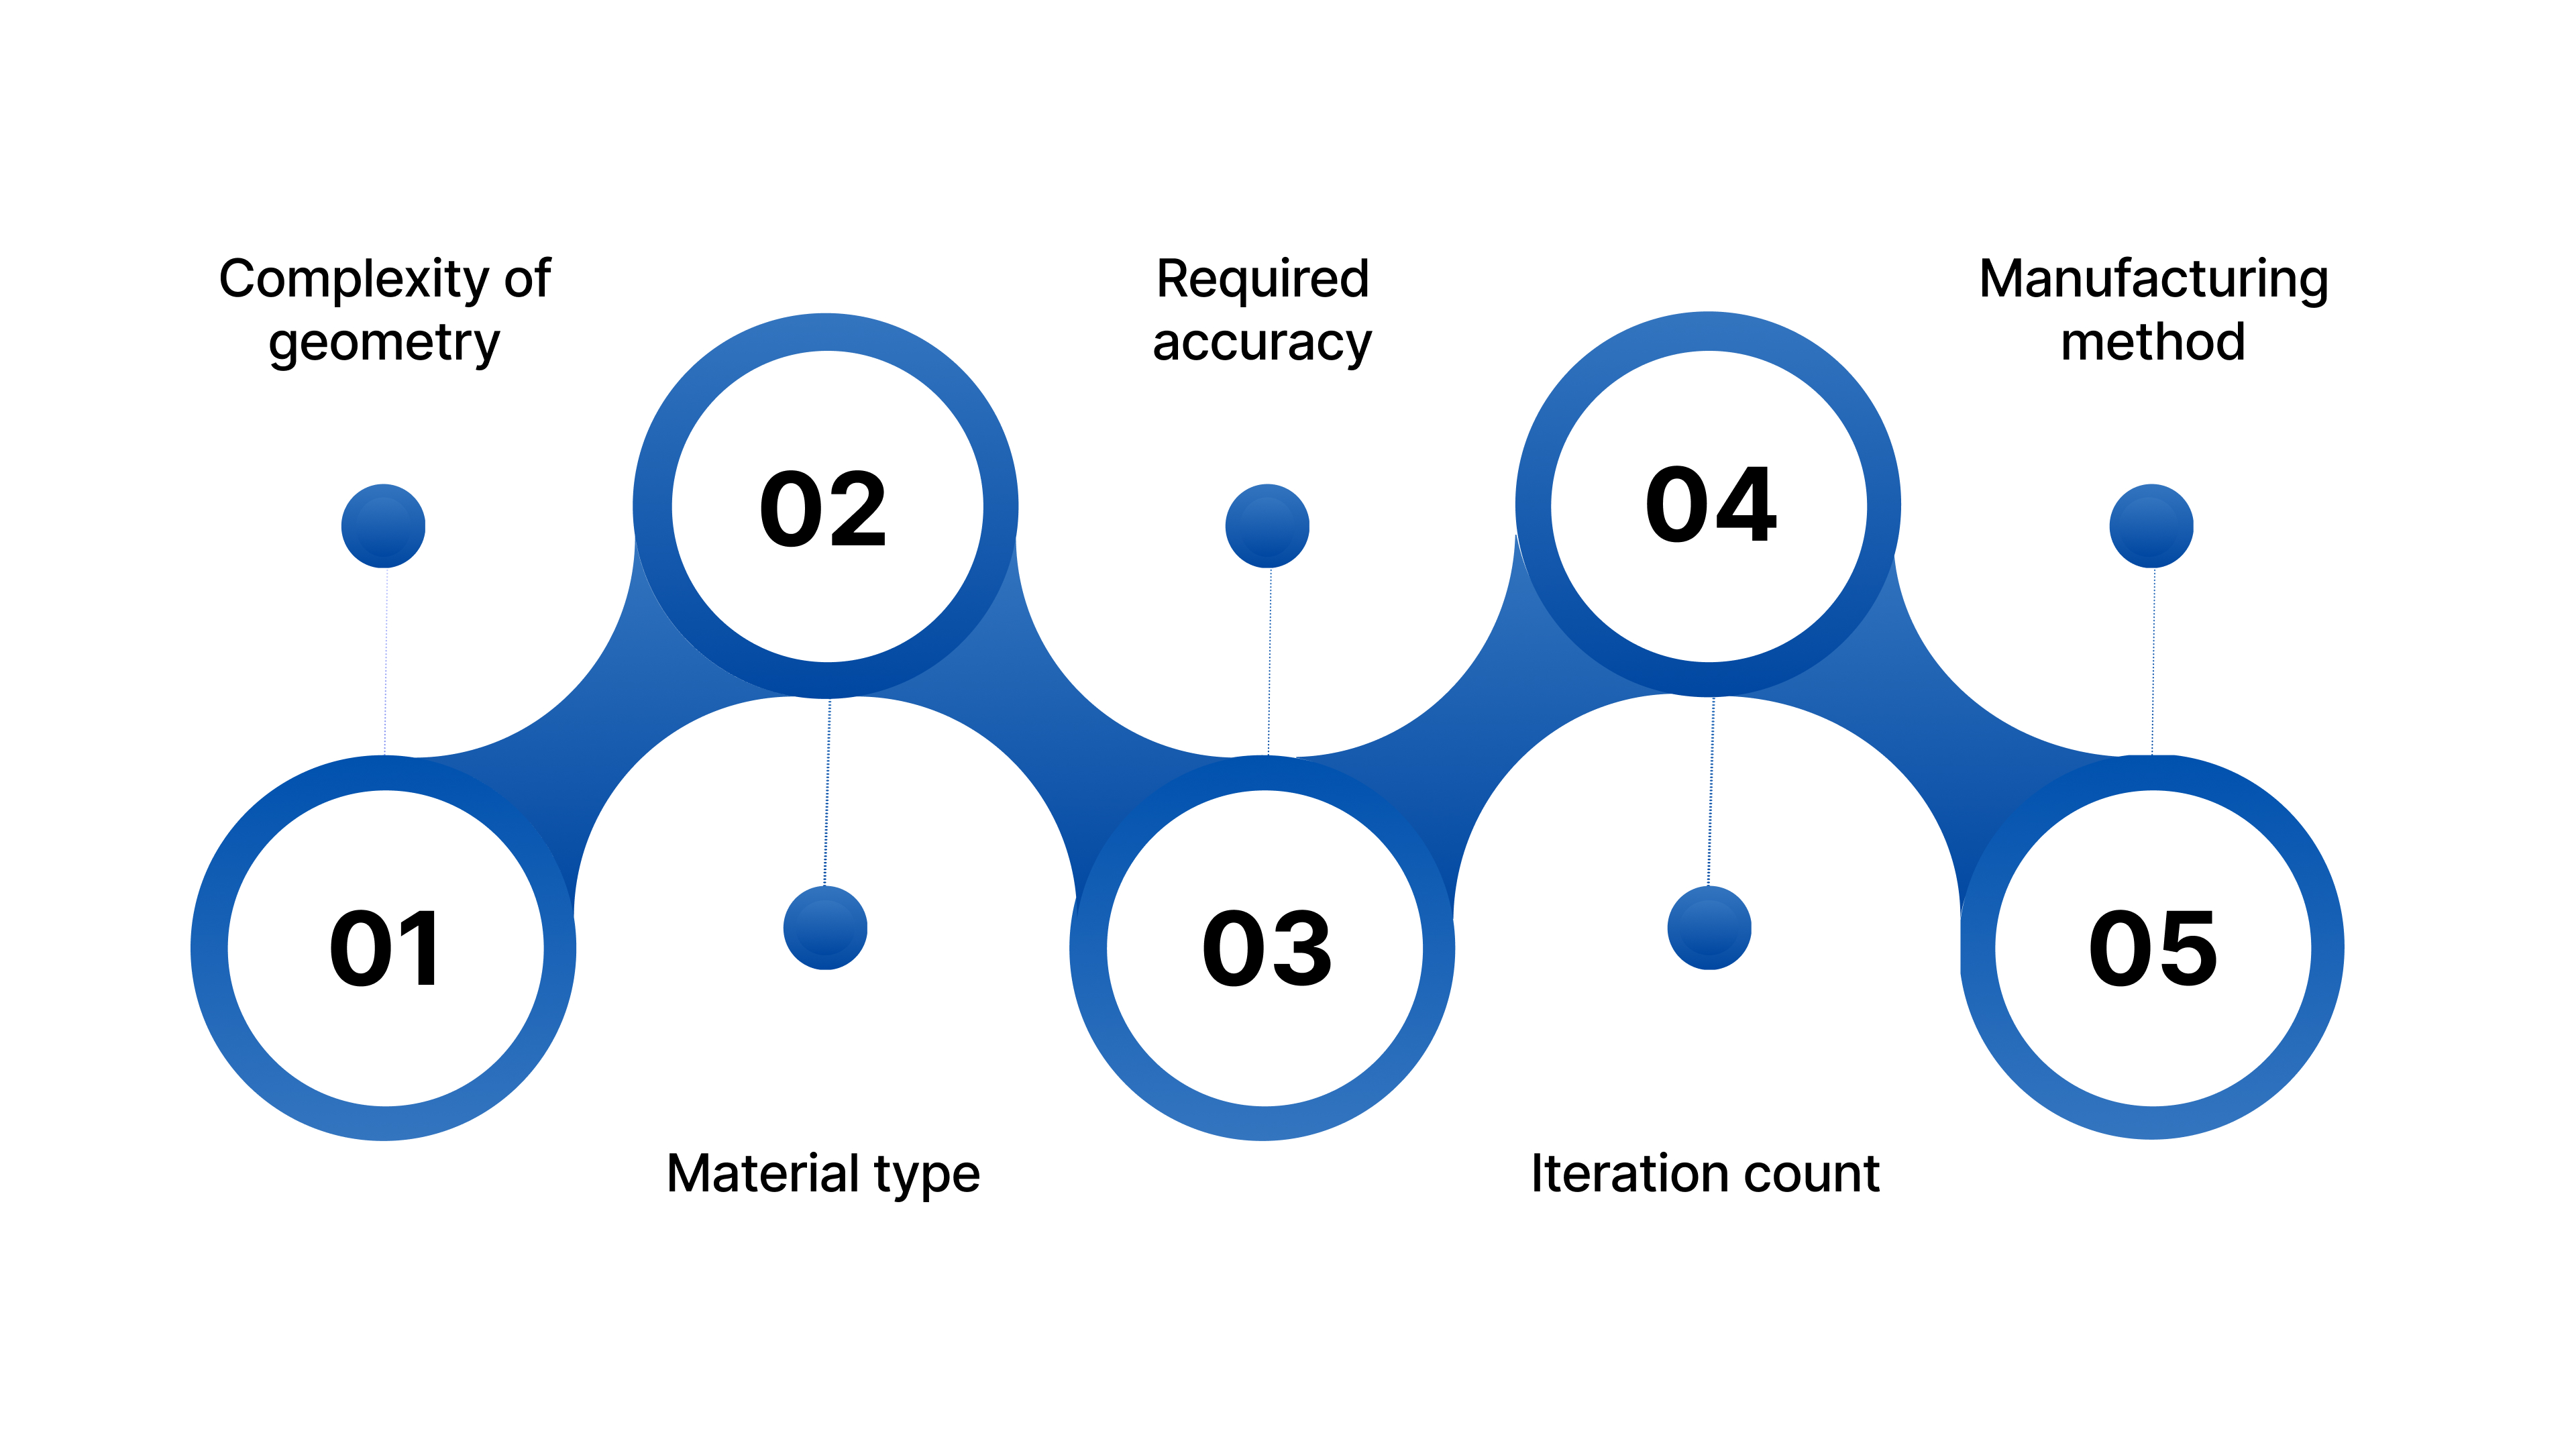
Complexity of geometry: Intricate features require support structures, multi-axis machining, or post-processing. More details increase setup time, programming effort, and inspection requirements, extending build duration and raising prototype fabrication cost.
Material type: Engineering plastics and metals demand specialized tooling parameters, slower machining speeds, or controlled printing environments. Harder or high-temperature materials increase machine wear, processing time, and material expense.
Required accuracy: Tighter tolerances require precision machining, calibrated equipment, and detailed inspection. High-accuracy prototypes often need secondary finishing or measurement verification, increasing both production time and engineering validation effort.
Iteration count: Frequent revisions multiply setup and manufacturing cycles. However, early iterative prototype design models reduce late-stage redesign costs by identifying performance problems before expensive tooling commitment.
Manufacturing method: 3D printing enables rapid changes but limited material realism, while CNC and soft tooling provide accuracy at a higher cost and longer lead time. Selecting the correct method balances validation needs and schedule.
Planned prototype design models reduce total project expense despite upfront effort. Efficient iteration now becomes important.
Iteration Strategy: How Many Prototype Versions Do You Really Need?
More prototypes do not always mean better development.
An effective iteration plan follows staged validation rather than repeated random revisions:
Early stages: Fast Iterations
Use quick-build prototype design models such as 3D prints or simplified parts to evaluate geometry, ergonomics, and layout. Rapid feedback allows frequent design updates without investing time in material accuracy.
Mid stages: Functional Validation
Transition to engineering-grade prototype design models using realistic materials and tolerances. Validate load paths, assembly fit, and mechanical behavior so performance issues appear before tooling decisions.
Final stages: Minimal Revisions
Create near-production prototype design models that verify manufacturability, assembly workflow, and quality consistency. Only small adjustments should remain, preventing costly mold changes after production release.
Controlled iteration using structured prototype design models prevents endless redesign cycles.
How Evok Polymers Supports Prototype Design Models Development?
Evok Polymers partners with OEMs, startups, and engineering teams to convert ideas into manufacturable products using structured prototype design models that align development with production realities.
We help by:
Conducting engineering feasibility reviews: Evaluate geometry, wall thickness transitions, draft, tolerance stack-ups, and assembly loads against real manufacturing constraints. This prevents late tooling redesign by identifying molding risks, structural weakness, and cost drivers before any hardware is built.
Producing functional prototypes: Manufacture prototypes using processes that simulate final production behavior, not just visual models. This allows accurate testing of snap-fits, sealing, motion, and durability, reducing false confidence caused by unrealistic prototype builds.
Selecting production-ready materials: Recommend prototype materials that replicate the shrinkage, stiffness, and thermal behavior of intended production resins. This ensures testing results predict real-world performance rather than misleading lab outcomes from substitute materials.
Validating manufacturing readiness: Assess gate locations, assembly sequence, tolerances, and handling during pilot builds. The goal is to ensure the design transitions to tooling without hidden manufacturability risks, preventing expensive mold corrections after steel cutting.
Guiding iteration strategy: Plan which prototype design models should be low-fidelity, engineering-grade, or pre-production. This avoids unnecessary prototype cycles while preserving validation confidence and keeping development timelines predictable.
Engineers choose Evok Polymers because product development and manufacturing engineering progress together, reducing risk before major investment.
Conclusion
Successful products rarely emerge from a single design attempt. They develop through structured validation, testing, and refinement. Prototype design models provide measurable proof instead of assumptions, helping teams eliminate risk before committing to tooling and large production budgets.
When companies skip structured prototyping, they face rework, delays, and performance failures. When they use disciplined prototype design models, they achieve predictable launches and stable quality.
Are you confident your current design would survive real-world testing and manufacturing conditions?
Evok Polymers helps engineering teams validate performance early and transition designs smoothly into production. Request a quote to evaluate feasibility, reduce risk, and accelerate your product launch timeline.
Frequently Asked Questions
1. What are prototype design models in product development?
Prototype design models are early physical or digital representations of a product used to test ideas before manufacturing. They help evaluate form, fit, and function, identify engineering risks, and verify usability. By validating assumptions early, teams reduce redesign costs, shorten development timelines, and improve final product reliability.
2. Why are multiple prototype design models needed?
Different prototype design models answer different questions. Early models check size and ergonomics, mid-stage prototypes validate mechanical behavior, and late-stage versions confirm manufacturability. Using multiple stages prevents over-engineering early and under-testing late, ensuring the product performs correctly before investing in tooling and production.
3. What is the difference between low-fidelity and high-fidelity prototypes?
Low-fidelity prototypes focus on concept validation and quick iteration using inexpensive materials. High-fidelity prototypes replicate final materials, tolerances, and performance. The first guides design direction, while the second confirms production readiness. Choosing correctly avoids wasted cost and ensures testing matches development stage objectives.
4. Which manufacturing methods are commonly used for prototype design models?
Common methods include 3D printing for rapid geometry validation, CNC machining for accurate tolerances, vacuum casting for small functional batches, and soft tooling for pre-production testing. Each technique balances speed, cost, and realism depending on whether the goal is concept evaluation or manufacturing verification.
5. How do prototype design models reduce product development risk?
Prototype design models expose design flaws before tooling investment. Engineers can adjust geometry, materials, and assembly methods early. This prevents expensive mold modifications, delays, and product failures. Structured prototyping converts assumptions into measurable data, improving confidence in performance and manufacturability before mass production begins.